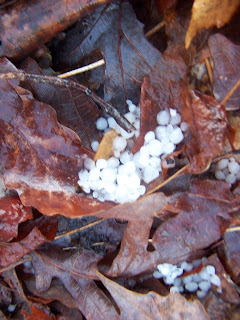
Next week will be warm with NO rain...a big change here in north Georgia! Today we had thunderstorms and hail!
I am ready to get out in my garden. I love gardening...flower, vegetable, fruit.landscaping...any of it! It's a great stress reliever. I've tried traditional ground gardening, almost complete organic gardening and now I am somewhere in the middle. I have 8 4'x16' raised beds for vegetables. they are made out of 2'x10" rough sawn hemlock boards. They are filled with "topsoil" from a retired cow pasture and then enriched with compost, horse manure, leaves and hay.
They look so sad and lonely...I didn't get to "winterize" my my garden last fall...I'm determined to do it this year!
I have 3 6"x12" beds for strawberries, rasberries and a blueberry patch. Last year, I formed three beds and a punkin' patch using the "lasagna gardening" method. I started two more but after a car accident I didn't get them finished. I hope to take pictures of them this week while the sun is shining.
The bed above is set up to be covered with plastic during the cold weather and it becomes my greenhouse! the plastic that covers the bed can be lifted on warm sunny days or if it needs to be watered. Last year, I was able to plant lettuce, spinach, carrots and radishes in February and March. This year it has been too cold and too wet. :(
I like to start some of my own seeds indoors so that when it is warm enough to plant, they will already be well on their way. Squash, cucumbers, pumpkins and gourds are some of the seedlings that don't like to have their roots disturbed once they start growing, so it's best to start them in something that can be planted right into the ground with the plant inside. You can buy peat pots ooorrrrr...you can make your own thrifty seed starting pots with these:
Newspaper and/or paper towel or toilet paper tubes!
These little pots really work and are FREE! They hold the moisture and breakdown when planted. You want to make sure that you don't use the slick or colored paper from the ads. Just regular black and white newspaper. First start with a single page ( half of a double page spread) and fold it in half. Fold it in half length wise and press the fold flat.
Fold it "almost" in half lenght wise again. Press the fold flat again.
Place the vitamin bottle or small cup or anything you have that would give you the right size, on the newspaper with about an inch or a little less extending off of the bottom of the bottle.
Roll the bottle tightly in the newspaper.
Press the part of the newspaper that is hanging over the bottom inward, this forms the bottom of the cup.
Place the newspaper wrapped bottle firmly on a table and press down to compress the bottom.
Finally, pull the bottle out and you have a homemade, biodegradeable and FREE seedling pot!
Some people use empty toilet paper or paper towel tubes for starting seeds. Jusst cut and fill! I haven't used them but plan on giving them a try this year. They are smaller and don't have bottom, so we'll see...
I put the cups in a metal pan (found at the thrift store of course) and fill them with a seed starting mix. Potting soil doesn't work well for this. I've tried because it's less expensive, but it doesn't hold the moisture and it's too coarse for the seeds. When the pots are all in the pan with their sides touching they support each other and stand up just fine.
I could talk about gardening forever...but I'll stop for now. All that's left to do is insert a seed, and water. Keep moist...you can even drape plasic wrap over the top to help hold in the moisture. Set in a warm place and wait for the little sprouts to appear!
Next time I'd like to share what I do after they sprout and explain "Lasagna gardening". If you are intrigued by the name and don't want to wait for me, you can find out more for yourself
here and
here.


